Edit a media item's information
To edit a media item’s information in Videas, open its page from Mediasbox (your media library), stay on the Overview tab, change the fields you want — Name, Description, Slug, Tags, thumbnail — then click Save in the bar that appears at the bottom of the screen. You need the Editor role (or higher) on the workspace; Viewer roles cannot edit media pages.
This guide covers everything you can change from a media item’s page, whatever its type (video, audio, document, image or collection), including the AI assistant and custom metadata.
Open a media item’s page
In Mediasbox, click a media item’s thumbnail (or its title in list view). Its detail page opens, organized into several tabs at the top of the screen.
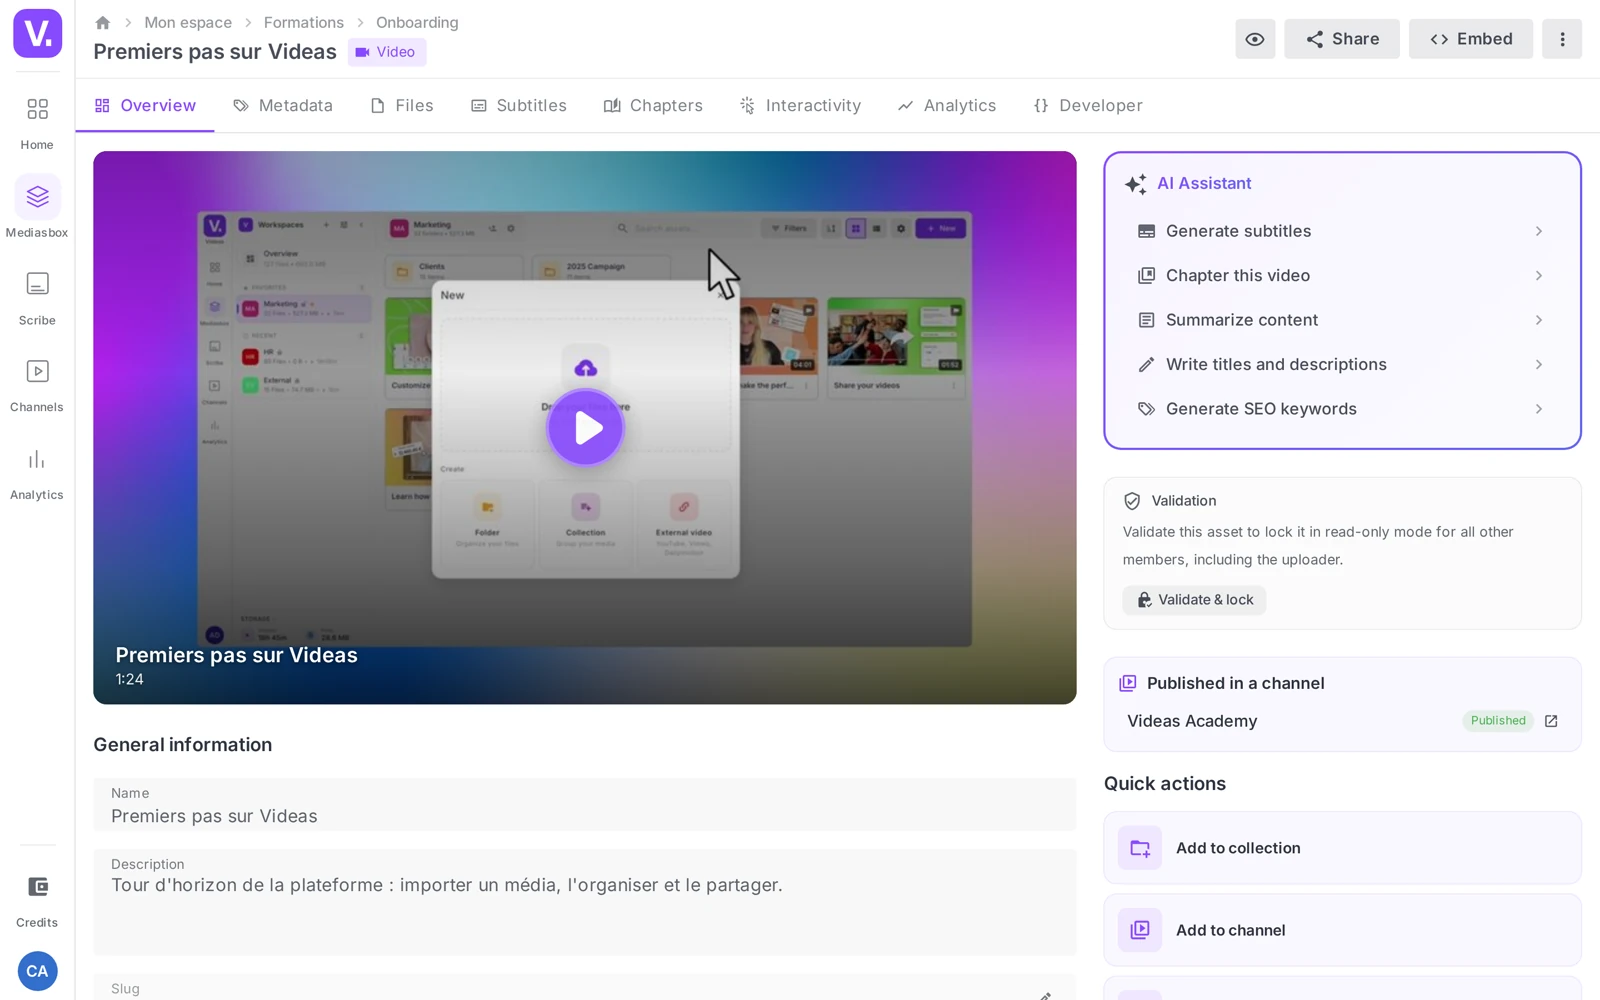
Depending on the media type, you will see all or some of these tabs:
| Tab | Available for | What it is for |
|---|---|---|
| Overview | All | Name, description, slug, tags, thumbnail, file details |
| Content | Collections | Manage the media included in the collection |
| Metadata | All (except collections) | Custom fields defined by your workspace |
| Files | All (except collections) | Versions, attached files, alternative audio tracks |
| Subtitles | Video, audio | Generate, import or edit the subtitles |
| Chapters | Video, audio | Split the content into navigable chapters |
| Interactivity | Video | CTAs, polls, recommendations at the end of playback |
| Analytics | Video, video collections | Playback performance |
| Developer | All | Embed codes and IDs for the API |
This guide focuses on the Overview tab, where the main information is edited. The Subtitles, Chapters and Interactivity tabs have their own articles.
Edit the main information (Overview tab)
The Overview tab opens by default. Its editable fields are grouped in the General information section.
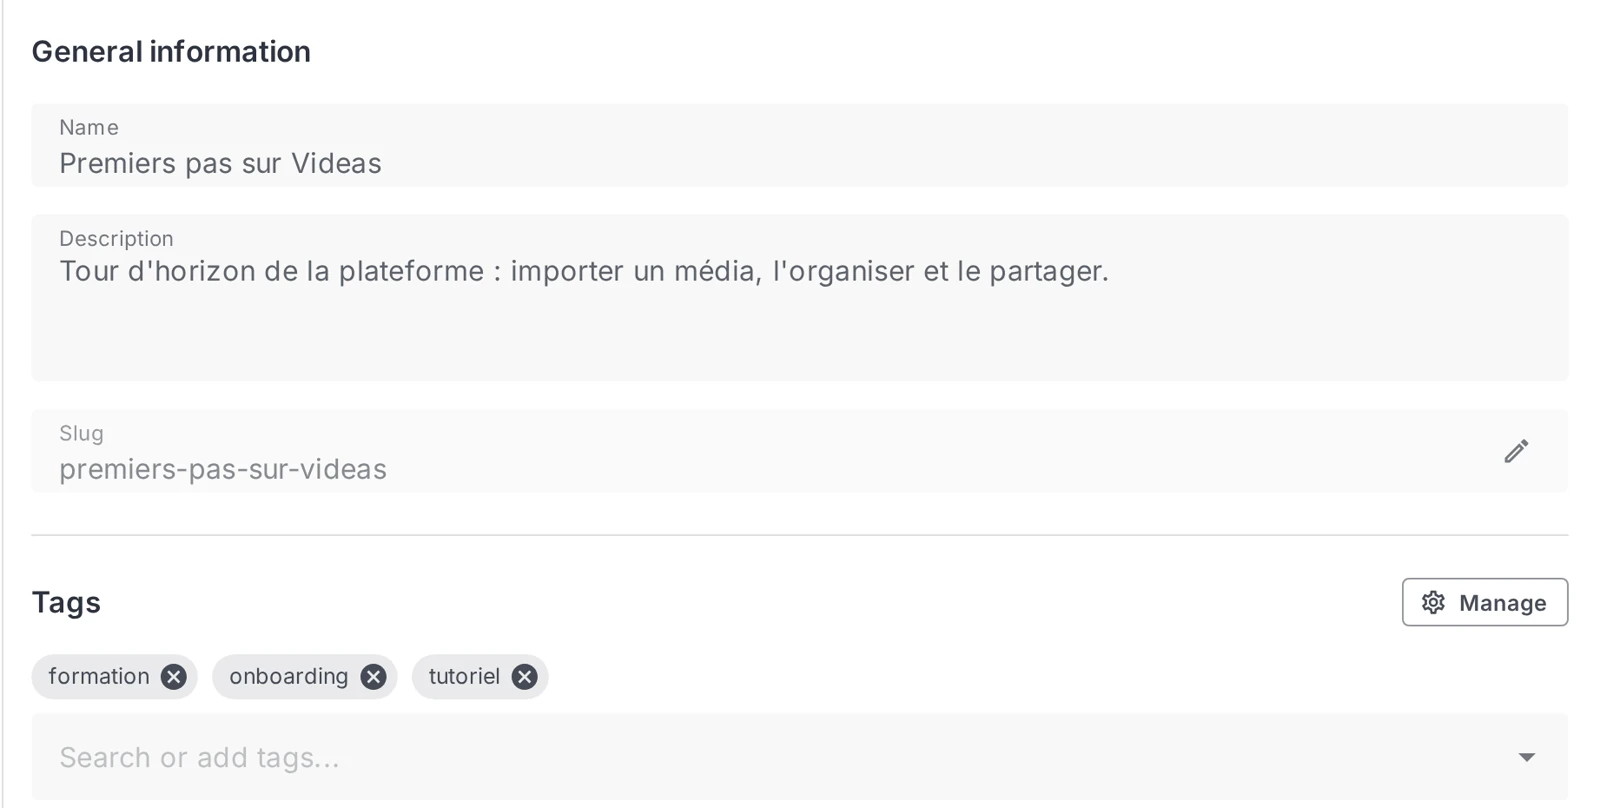
Name
Your media item’s display title, everywhere it appears: Mediasbox, player, search, shares, embeds. Limited to 255 characters.
Tip: take care over the Name — it doubles as the web title when the media item is published on a channel, and search engines pick it up (see the SEO section below).
Description
Free text describing the content (summary, context, speakers and so on). The field accepts several lines and grows as you write. It is plain text: Markdown formatting is not interpreted, so there is no point adding **bold** or ## headings.
Slug
The Slug is the identifier that appears in your media item’s public URL once it is published on a channel. You can type it yourself, or click Generate from name to produce a clean slug automatically.
Careful: if your media item is already published on a channel, changing the slug changes its URL. Every existing link (sent by email, embedded on a site, posted on social media) will stop working. Videas shows an explicit warning before saving.
Tags
Tags are there to classify and find your media in Mediasbox (and to filter on a channel). In the Tags field, type a word into Search or add tags…: Videas offers autocomplete, and you can Create tag on the fly if it does not exist yet. The Manage button opens the workspace’s tag vocabulary.
Good to know: an Admin can restrict tags to a closed list (workspace settings). In that case the field only shows Search tags… and you can only pick from the existing tags.
File details (read-only)
The File details card sums up the technical information you cannot change: date added, duration (video/audio), format, owner.
Save your changes
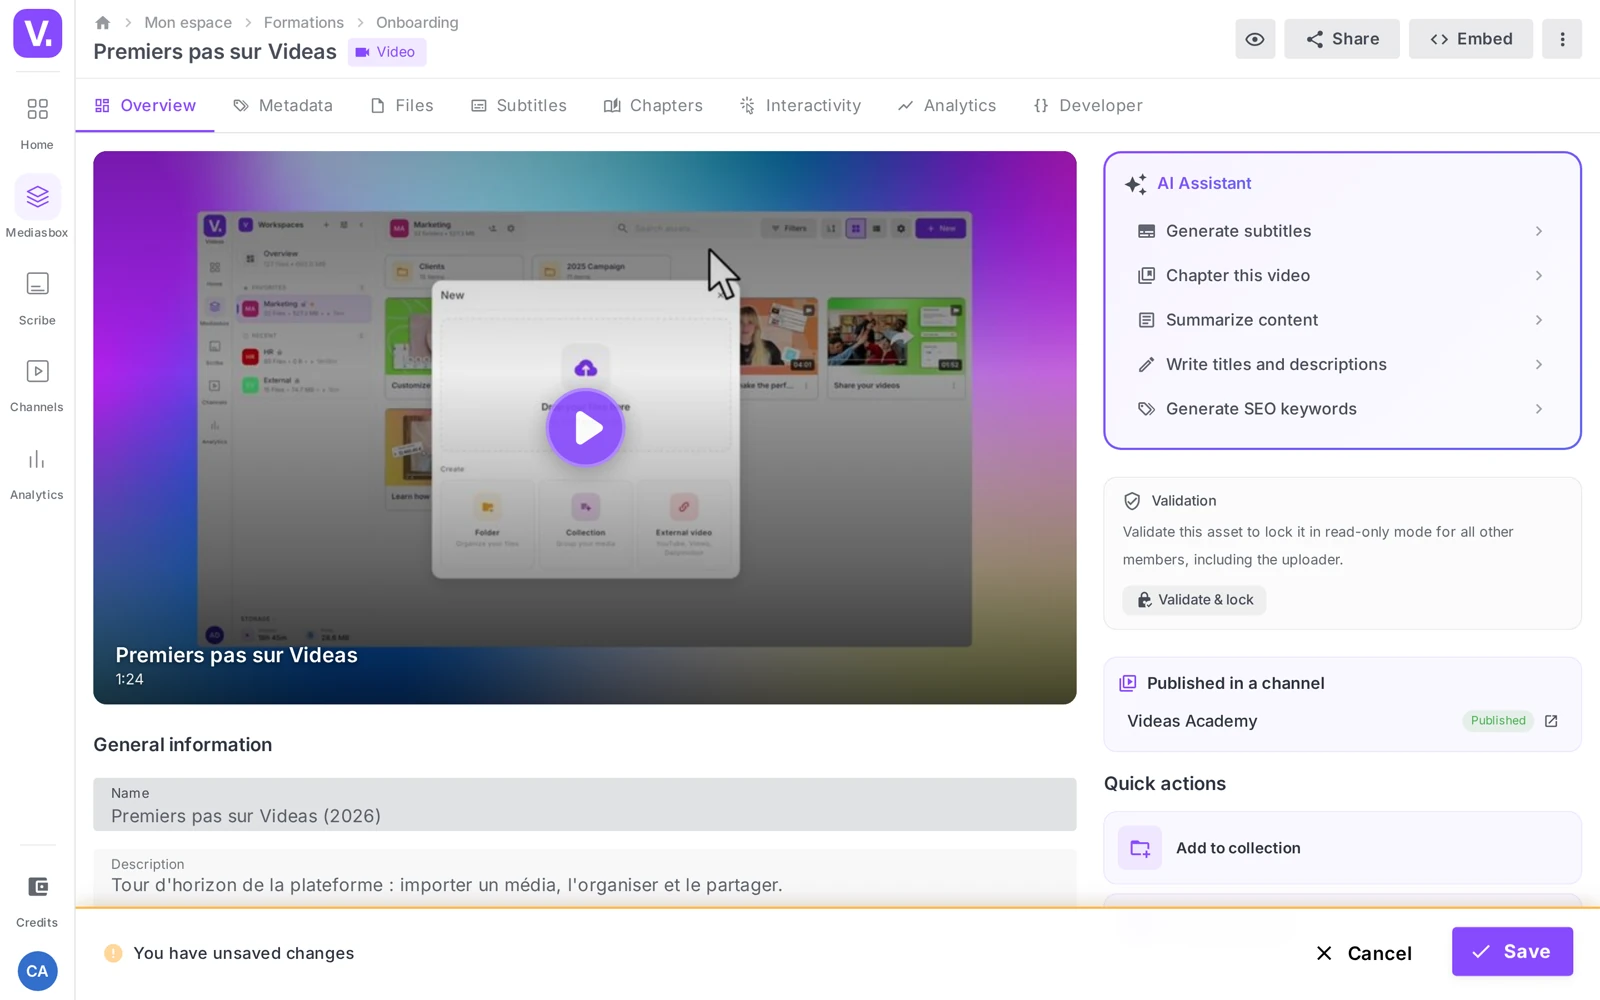
As soon as you change a field, a save bar appears at the bottom of the screen with the message You have unsaved changes and two buttons:
- Save: applies your changes (confirmation message Changes saved)
- Cancel: reverts to the previous version
There is no autosave — remember to click Save before leaving the page.
Customize the thumbnail
Videas automatically generates thumbnails from your media. You can add others and pick which one is the main one, in the Thumbnails section.
The Add button offers two options:
- Upload an image: from your computer, in JPEG, PNG or WebP format, up to 10 MB
- Capture from the video: for videos only — a player opens and lets you choose the exact moment to capture
Once several thumbnails have been added, click the one you want to set it as the main one (Selected badge). You can delete one at any time.
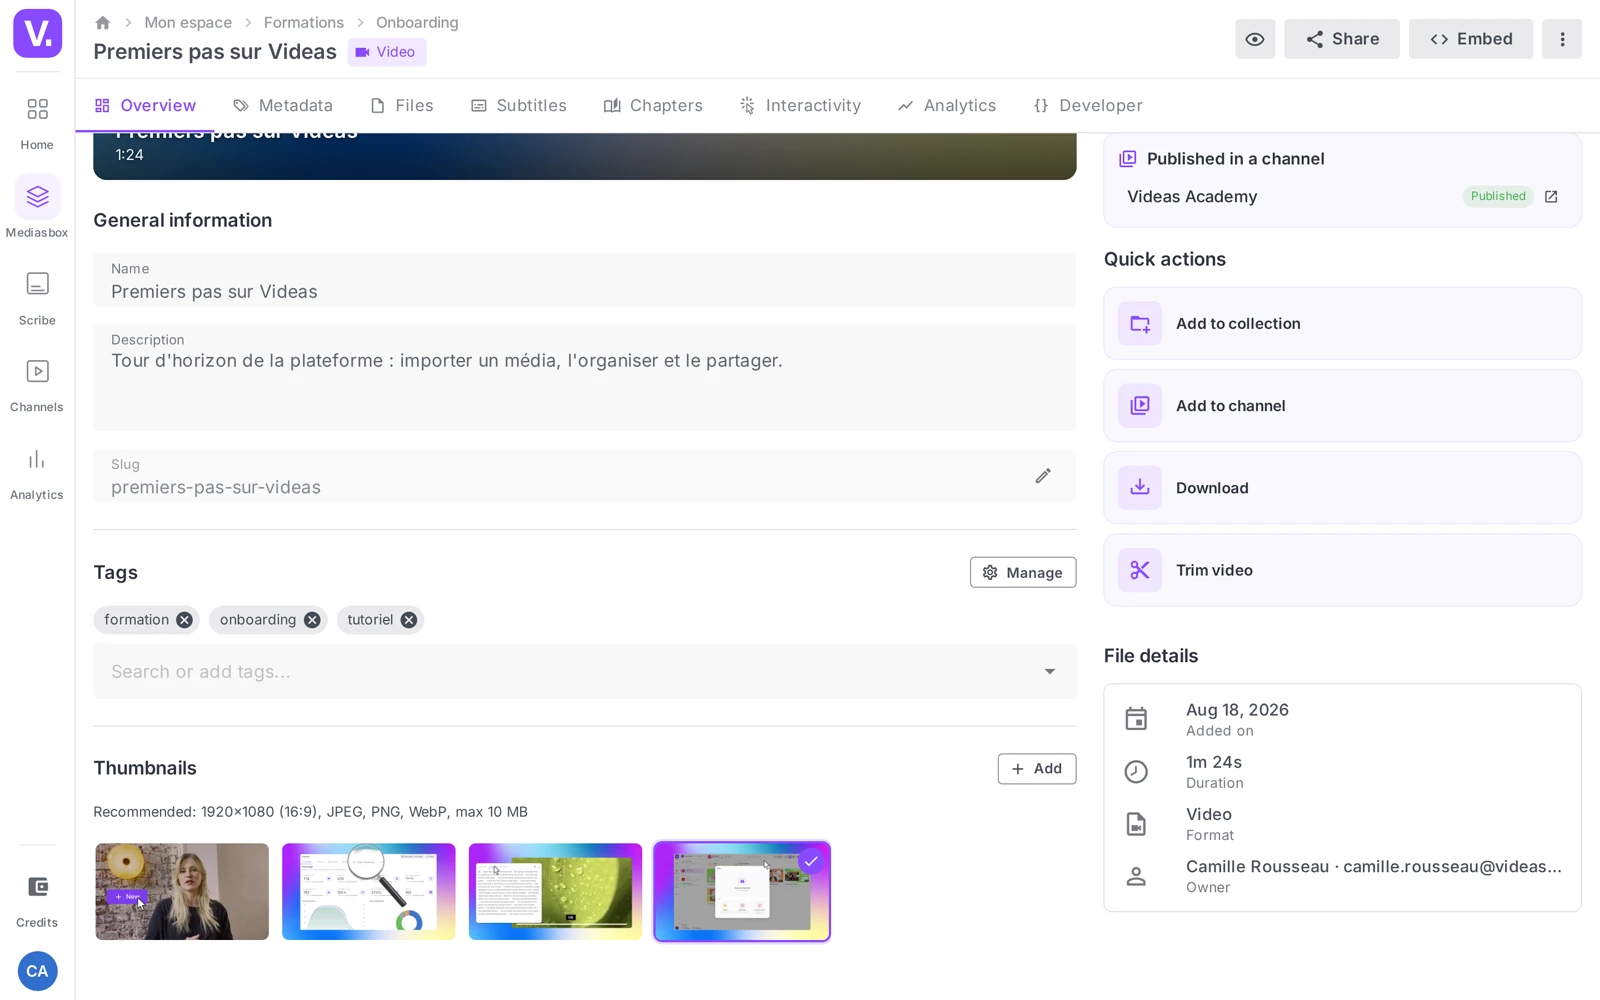
Tip: a good thumbnail makes people want to click. Go for a sharp visual, readable at small sizes, with a face or a strong element. It is also the image shown when someone shares your video on LinkedIn, X or Facebook.
Use the AI assistant
The AI assistant panel on the media page offers automated actions that draw on your media item’s content (transcript, image, metadata): writing a title and a description, generating keywords for search, summarizing the content, or launching the subtitles and the chaptering.
Good to know: the assistant relies on the audio transcript. It therefore works best on videos and audio where the voice is clear. For musical content or content with no speech, some actions are unavailable. Details in Generate a video’s title and description automatically.
Fill in custom metadata
If metadata schemas have been configured for your organization (for example: speaker, level, target audience, training code and so on), a Metadata tab appears on the page. There you fill in custom fields — free text, a list of choices, or a link to another record.
These fields structure your media in fine detail beyond tags, and they feed the advanced filters and the exports.
Good to know: if the Metadata tab is missing, no schema has been configured for your organization. That configuration is done with the Videas team — contact support for specific fields.
Copy the information from another media item
For several related media items (the episodes of one series, for instance), there is no need to retype everything. From the More actions menu at the top of the page, choose Import info from another asset, pick a source media item, and tick the fields to copy: Title, Description, Tags (add or replace mode) and Custom metadata.
Publish to a channel from the media page
Two Quick actions on the Overview tab extend the editing:
- Add to a collection — group the media item into a playlist
- Add to a channel — publish it on one of your video sites
The Published on a channel section shows, read-only, where the media item is delivered, with the status for each channel (Published, Scheduled, Draft). The publishing procedure is covered in Publish a video on your channel.
What about SEO?
Many users look for an “SEO” tab with separate SEO title and SEO description fields. Videas does not work that way — and that is deliberate.
When your media item is published on a channel, Videas reuses your main information directly to generate the tags that search engines and social networks read:
| Web SEO element | Where Videas takes it from |
|---|---|
<title> tag (the Google title) |
The media item’s Name |
<meta description> tag |
The media item’s Description |
| Keywords / topic | The media item’s Tags |
| OpenGraph image (social preview) | The main thumbnail |
| Canonical URL | The media item’s Slug |
In practice:
- Take care over the Name: short, descriptive, with the keywords your readers will type — that is what shows up in Google.
- Write a real Description: 1 to 3 sentences of summary, not just “Welcome to this video”.
- Choose the thumbnail carefully: it is the preview when the video is shared on social networks.
- Use the AI assistant to generate keywords from the transcribed content.
Remember: no separate SEO field = no duplication to maintain. Your main information is your SEO metadata.
Troubleshooting
| Symptom | Likely cause | Solution |
|---|---|---|
| Save button missing or greyed out | No field changed | Change at least one field |
| Cannot create a tag | Workspace in closed-list mode | Ask an Admin to add the tag |
| The AI assistant does not offer everything | No transcript (media with no speech) | Generate a transcript first |
| Slug change refused | Warning not confirmed | Confirm in the warning window |
| Metadata tab missing | No schema configured | Contact Videas support |
What happens if I change the slug of a video that is already published?
Every existing link stops working. The Slug forms the media item’s public URL on your channel: changing it produces a new address, and the old one does not redirect. Emails you have sent, embed codes pasted on a site and social media posts all point nowhere.
Videas shows an explicit warning before saving. The practical rule: settle the slug before publishing, and only touch it afterwards if you are prepared to circulate the new link everywhere.
Are my changes saved automatically?
No, and that is the most common trap on this page. As soon as you change a field, a save bar appears at the bottom of the screen with the message You have unsaved changes: until you click Save, nothing is applied. Leaving the page at that moment loses your edits.
The Cancel button next to it returns to the previous version if you change your mind.
Where are the “SEO title” and “SEO description” fields?
There are none, and that is deliberate. When your media item is published on a channel, Videas builds the tags straight from your main information: the Name becomes the <title> tag, the Description the <meta description>, the Tags the topic, the main thumbnail the OpenGraph image shown when the link is shared, and the Slug the canonical URL.
The upside is that there is no duplication to maintain: your main information is your SEO metadata. In practice, look after the Name (short, descriptive, using the words your audience types) and write a real Description of one to three sentences.
Why doesn’t the AI assistant offer me every action?
Because it works from the media item’s audio transcript. With no detected speech — a piece of music, an image, a document — it has nothing to work with and some actions stay unavailable.
Generate a transcript first from the Subtitles tab: the assistant then recovers its full range of actions (title, description, summary, keywords, chapters).
In short
- A media item’s page is organized into tabs; information is edited on Overview, in the General information section
- Essential fields: Name, Description, Slug, Tags, Thumbnails; you confirm through the save bar (no autosave)
- The Slug determines the public URL — changing it after publication breaks existing links
- The AI assistant writes titles, descriptions and keywords, and launches subtitles/chapters
- Videas has no separate SEO field: Name, Description, Tags and Thumbnail serve as the SEO tags
- Editing a media page requires the Editor role (or higher)
Related articles
Screenshots were taken on Videas Academy, an example channel built for this help center. It belongs to a fictional customer, not to Videas: your own channel carries your name, your branding and your prices.