Invite collaborators to a workspace
To invite a collaborator: open your workspace, go to Settings → Team and click Invite. The modal covers both adding one person by email and onboarding a whole team through a reusable link.
Inviting requires being Admin of the workspace concerned (or Owner of the organization), and the workspace must already exist. This guide walks through every option: individual or bulk email invitation, reusable link, choice of role and workspaces, tracking and revocation.
Step 1: Open the invitation modal
From your workspace:
- Click Settings (gear icon)
- Open the Team tab
- Click the Invite button
A modal opens with three stacked sections: Role and workspaces, Invite link, Invite by email. You can move freely between modes — for example set up a link first, then finish with a few individual email invitations.
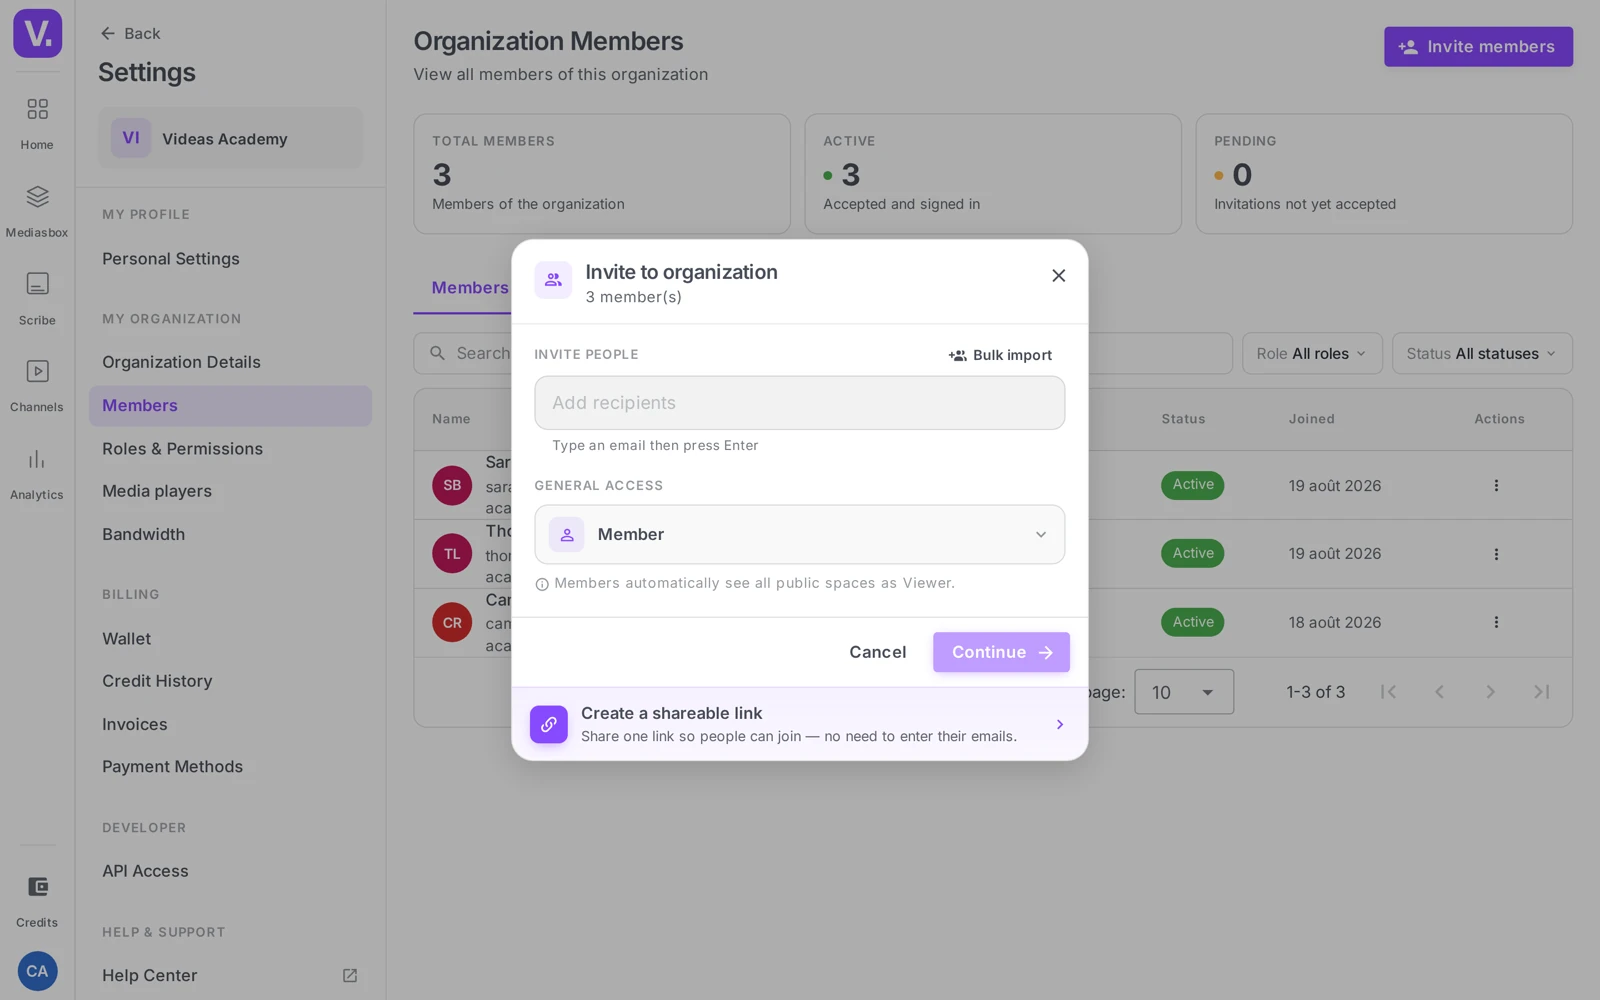
Important: the same modal invites collaborators into your organization; you then specify which workspaces they will have access to. Someone who is already a member of the organization can be added to a new workspace from this same modal, without receiving another sign-up email.
Step 2: Choose the role and workspaces
The first section, Role and workspaces, drives everything else in the invitation.
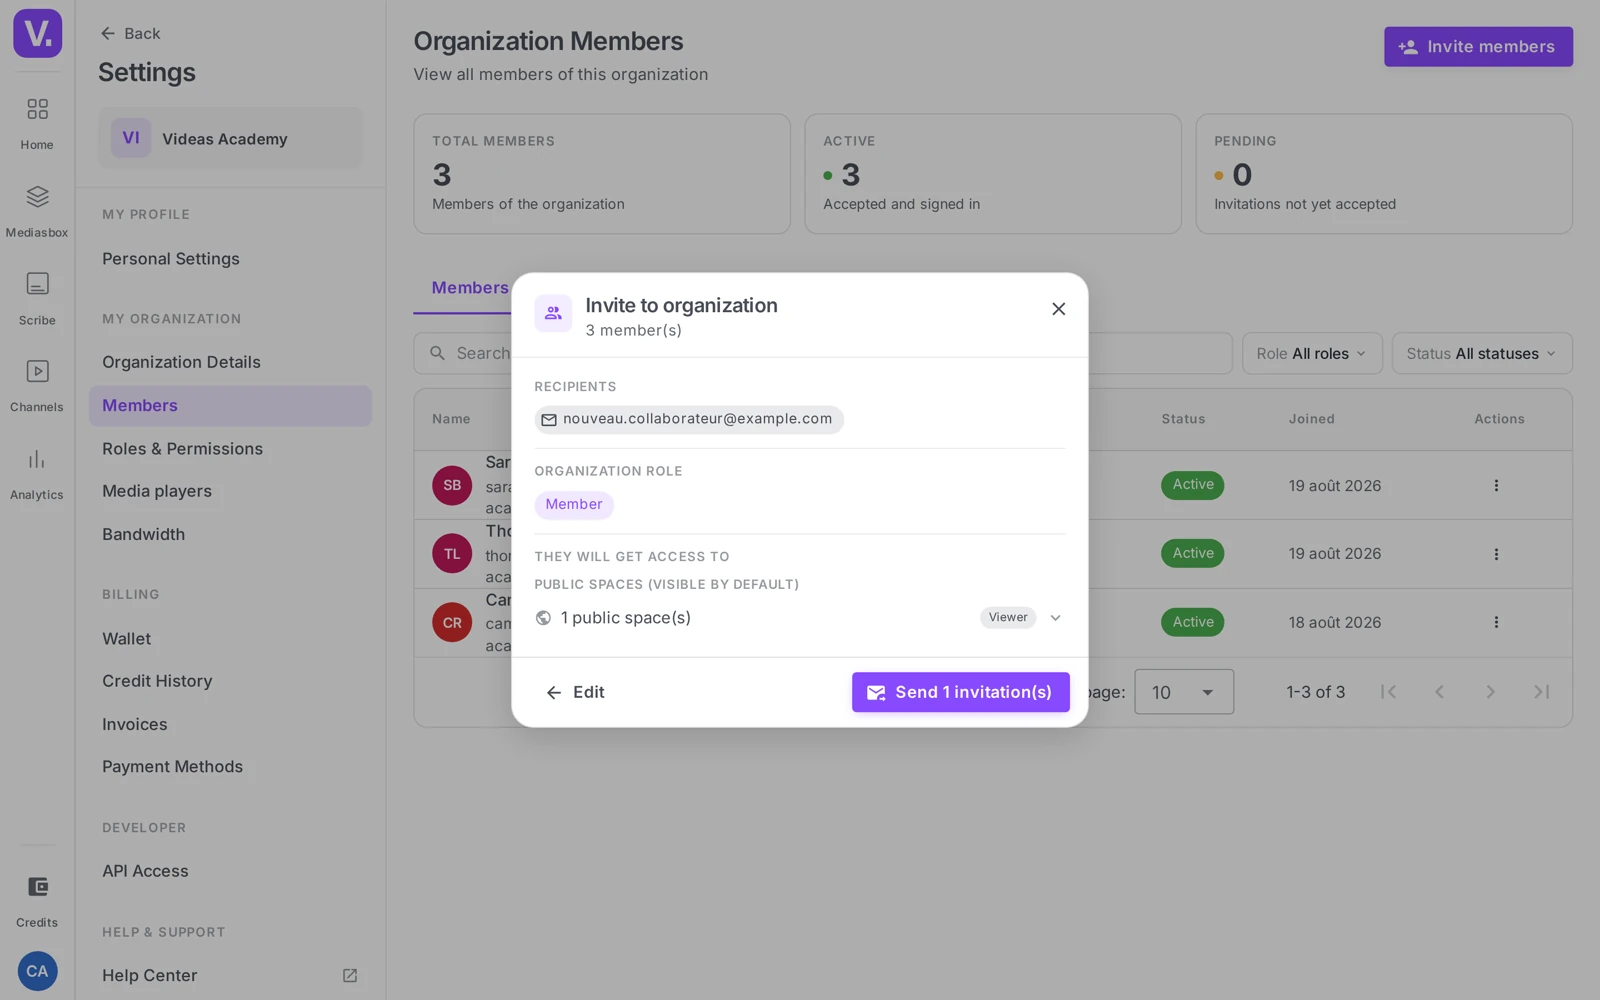
- Role: the collaborator’s access level on the selected workspaces — Viewer, Editor or Admin (or a custom role if the Videas team has configured one for you). It applies to every workspace the collaborator joins; you can always adjust it workspace by workspace afterwards.
- Workspaces: multi-select. You can pick a single workspace (the current one), several, or all at once. Handy when a new collaborator needs access to several projects at the same time.
This (role, workspaces) pair is remembered for every invitation you send from this modal — both the individual emails you type and the invite link you generate.
Tip: to handle the nuances (a collaborator who should be Admin on one workspace and Editor on another), invite them with the lower role on both first, then adjust their role individually once they accept. See the Change a role section below.
Step 3: Invite by email
This is the most common route.
Enter emails one by one
In the Invite by email section, type an address and press Enter. A “chip” appears. Carry on with other addresses for as long as you like. Click Send: Videas sends an email to each recipient, containing a personal link to join the organization.
Depending on the recipient’s situation:
- They already have a Videas account: they receive an email to accept or decline the invitation. Once accepted, they immediately join the organization and the selected workspaces.
- They do not have an account yet: their email contains a sign-up link. When they create their account, they automatically join the organization.
Email invitation validity: each invitation expires automatically after 7 days. Past that point, the personal link that was sent no longer works and the invitation status switches to Expired. To chase a recipient who did not reply in time, go back to the invitation modal and resend the email: a new invitation is created with a fresh 7-day window.
Import a list of emails
For bulk invitations (a whole team joining, a class of learners, a panel of testers…), click Import in the emails section. A panel opens where you can paste a list of addresses (separated by comma, semicolon, line break, or even formatted as Name <email@example.com>). Videas extracts the valid emails and adds them to the existing chips.
Handling duplicates and errors
At send time, Videas automatically detects two situations:
- Already a member: the address matches an existing member. A yellow alert lists those addresses, and no invitation is resent to them.
- Send failed: a red alert lists the addresses the send failed for (typically a malformed address that slipped through, or a problem on the SMTP side).
The remaining valid invitations are sent as normal. You can retry or fix the problem addresses without starting over.
Step 4: Reuse an invite link
When you know a large number of people will join — without being able to list their emails in advance — the invite link is the right tool. It can be used as often as you like, and shared on Slack, Teams, by email, by QR code, and so on.
Create a link
In the modal’s Invite link section, click Generate a link. Videas creates a link tied to the role and workspaces you selected in step 2. Click Copy link to save it to your clipboard.
Configure the link
Click Settings (at the bottom of the modal, or in the link section) to open the configuration panel. You can set:
- Name of the link: useful for keeping track when you have several (
Onboarding Q2,Interns,Client X workshop…) - Max number of uses: the link expires automatically after that many sign-ups / acceptances. Leave it empty for an unlimited link.
- Validity period: number of days before expiry. Recommended for temporary links (a one-week workshop, for example).
Any change takes effect immediately.
Deactivate or reactivate a link
You can deactivate a link at any time from the history (see the next step). Once deactivated, the link returns an error page when used. You can reactivate it later if needed.
Best practice: create a new link per cohort or per occasion, rather than reusing one permanent link. It is easier to trace, easier to revoke if it gets shared unintentionally, and it gives you a clear count of who joined through which channel.
Step 5: Track and manage invitations
Links created: the History panel
In the invitation modal, click the Invitation history card. A panel lists every link created for this organization, with its state (active / inactive), its usage counter, its creation date and its expiry date if any. For each link you can copy, deactivate or reactivate. This is the central console for managing your live links.
Members and pending invitations
In a workspace’s Settings > Team, the list shows every member with their status:
- Active: the member has accepted their invitation and is up and running
- Pending: the invitation has been sent but not yet accepted
- Expired: the 7-day window elapsed without acceptance (the old email link is no longer valid)
For pending or expired members, you can cancel the invitation (through the remove action — see below) or resend an invitation, which creates a new send with a fresh 7-day window.
Change a member’s role
From Settings > Team:
- Find the member in the list
- Click their current role: a selector opens
- Pick the new role from those available
- Confirm
The change is immediate: on the member’s next action, their permissions reflect the new role.
See also: for the full permission grid by role and how to assign them, see Manage roles and permissions.
Remove a member from the workspace
From Settings > Team:
- Find the member
- Click the Remove action (trash icon or three-dot menu)
- Confirm
The member loses access to the workspace immediately. If they are still a member of other workspaces in the organization, they keep those. If they are no longer in any workspace, their organization membership stays active but they have no visible content — you can also remove them from the organization from the overview.
Safeguards:
- You cannot remove yourself from a workspace where you are Admin (to prevent a workspace ending up with no Admin)
- You cannot remove the Owner of the organization
- For pending invitations, the Remove action cancels the invitation (the personal link becomes invalid)
Best practices
When to prefer individual email
- You know the exact addresses
- You want to time the invitation precisely (right when the person actually joins)
- You need a clear trace in the member list as soon as it is sent
When to prefer the link
- You are expecting more than 10 people whose email list you do not have in advance
- You want to share through Slack / Teams / a QR code
- You are running a cohort (training course, workshop, a team growing steadily)
- You want to cap it by time or by number of uses without managing each invitation individually
Access hygiene
- Run an annual audit: remove the members who no longer have a reason to have access
- Deactivate invite links after use (do not leave an onboarding link active forever)
- Give each collaborator the minimum role they need — see Manage roles and permissions
How long does an email invitation stay valid?
Seven days. After that, the personal link sent is no longer usable and the invitation’s status changes to Expired in the member list.
To chase someone who did not answer in time, go back to the invitation modal and resend the email: a new invitation is created, with a fresh seven-day window.
Email or invitation link: which one?
The individual email when you know the addresses, when you want to time the invitation personally, and when you need a clear record in the member list from the moment you send.
The reusable link when you expect more than a dozen people whose addresses you do not have in advance, when you want to share through Slack, Teams or a QR code, or when you are running a cohort that grows over time. It can be limited by number of uses and by duration, which saves handling each invitation individually.
What happens if the recipient has no Videas account?
They receive a sign-up link rather than an acceptance link. When they create their account, they automatically join the organization and the workspaces you selected.
If they already have an account, they get an email to accept or decline; once accepted, the invitation brings them in immediately. In both cases, someone already a member of the organization can be added to a new workspace through the same modal, without receiving another sign-up email.
How do I give a different role per workspace?
Not in a single invitation: the (role, workspaces) pair chosen at the top of the modal applies to all the selected workspaces.
The manoeuvre is to invite with the lowest role across the board first, then adjust individually after acceptance, from Settings → Team: click the member’s current role and pick the new one. The change is immediate.
What happens to a member removed from a workspace?
They lose access to that workspace immediately, but keep the other workspaces they still belong to. If they no longer belong to any workspace, their organization membership stays active — simply, no content is visible to them any more.
Two safeguards frame the operation: you cannot remove yourself from a workspace where you are the Admin, to stop it ending up with no administrator, and you cannot remove the organization Owner. On an invitation still pending, the Remove action cancels the invitation and invalidates the personal link.
Should I keep an invitation link permanently active?
No. Create one link per cohort or occasion instead — Q2 onboarding, Interns, Client X workshop — and deactivate it once the operation is over, from the Invitation history.
That is more traceable, easier to revoke if the link is shared beyond its intent, and it gives you a clear count of who joined through which channel. An onboarding link left active indefinitely is, conversely, an open door nobody watches.
In short
- Invitations happen from a workspace’s Settings > Team, Invite button
- You set role + workspaces first, then choose emails or a link
- Email accepts bulk invitations (typed in or pasted via import)
- The reusable link is configurable (name, max uses, duration) and revocable from the history
- The status (Active / Pending) tracks the invitation until it is accepted
- Changing a role and removing a member happen on the same page, with safeguards (no removing the Owner or yourself)
Related articles
Screenshots were taken on Videas Academy, an example channel built for this help center. It belongs to a fictional customer, not to Videas: your own channel carries your name, your branding and your prices.