Create access groups for your channel
Access groups bring users together by profile (a training cohort, an internal team, partners…) and grant them collective access to a selection of content, with an optional expiry date. In Videas, open the Users section, Groups tab: click Create a group, add members, then Grant access to the content you want from the group’s Access tab.
This guide covers creating a group, its members, granting content and the multi-group logic.
Create a group
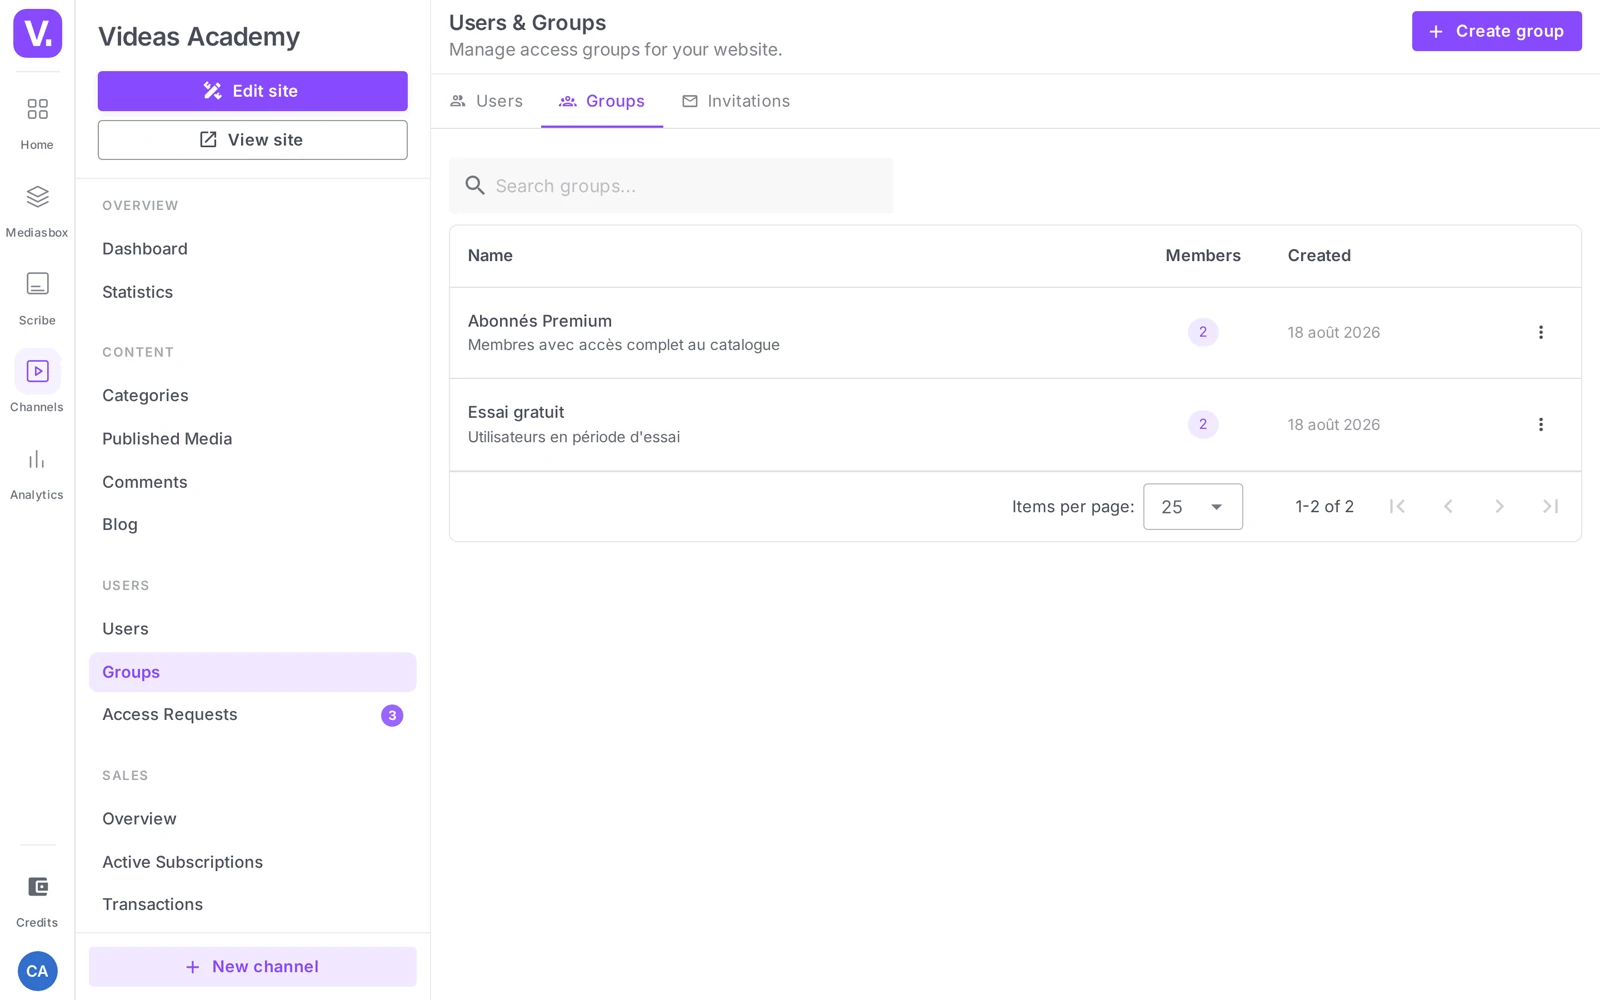
From your channel, open Users → Groups tab. The list shows the columns Name (with the description underneath), Members and Created on.
Click Create a group: a New group window asks for a Group name and a Description, then Create. You land on the group page, organized into three tabs: Information, Members, Access.
The Information tab: name, description, expiry
The Information tab lets you refine the group and — this is where it happens, not at creation — set an Expiry date (the Expiry section):
- Group name (required, 2 to 100 characters) — e.g. “Class of 2026 — March”, “Internal staff”.
- Description.
- Expiry date — its help text spells it out: “After this date, the members of this group lose access to the content shared through this group. Their other access (direct rights, other groups, their own account) is not affected. Leave empty for no expiry.”
Once the date has passed, the group shows an Expired badge and a warning: “This group has expired. Members no longer have access to the group’s content.” You can extend or remove the date at any time to restore access.
Ideal for time-limited access: a 6-month course, a temporary press pack, a partner trial. You set the date once, and access cuts off on its own at the deadline.
Add members
Open the Members tab and click Add members: a search by name or email lets you select users (those already members are filtered out automatically). The members table shows User and Registered on; the Remove button (with confirmation) takes someone out of the group — they then lose the access granted through it.
Grant access to content
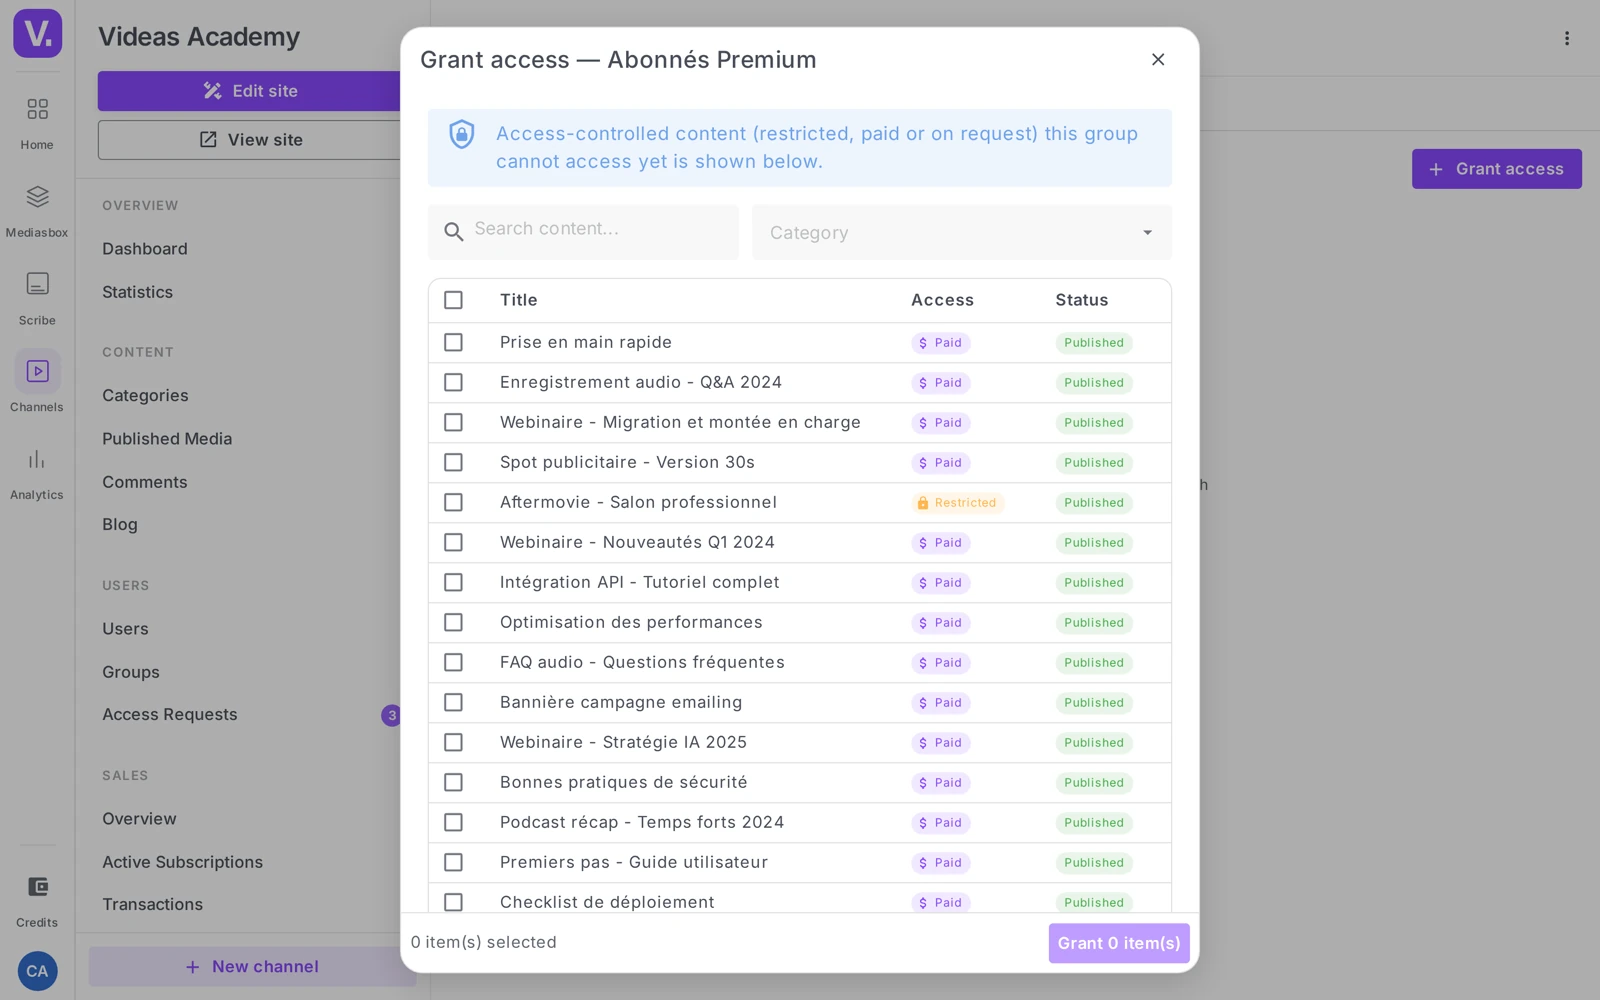
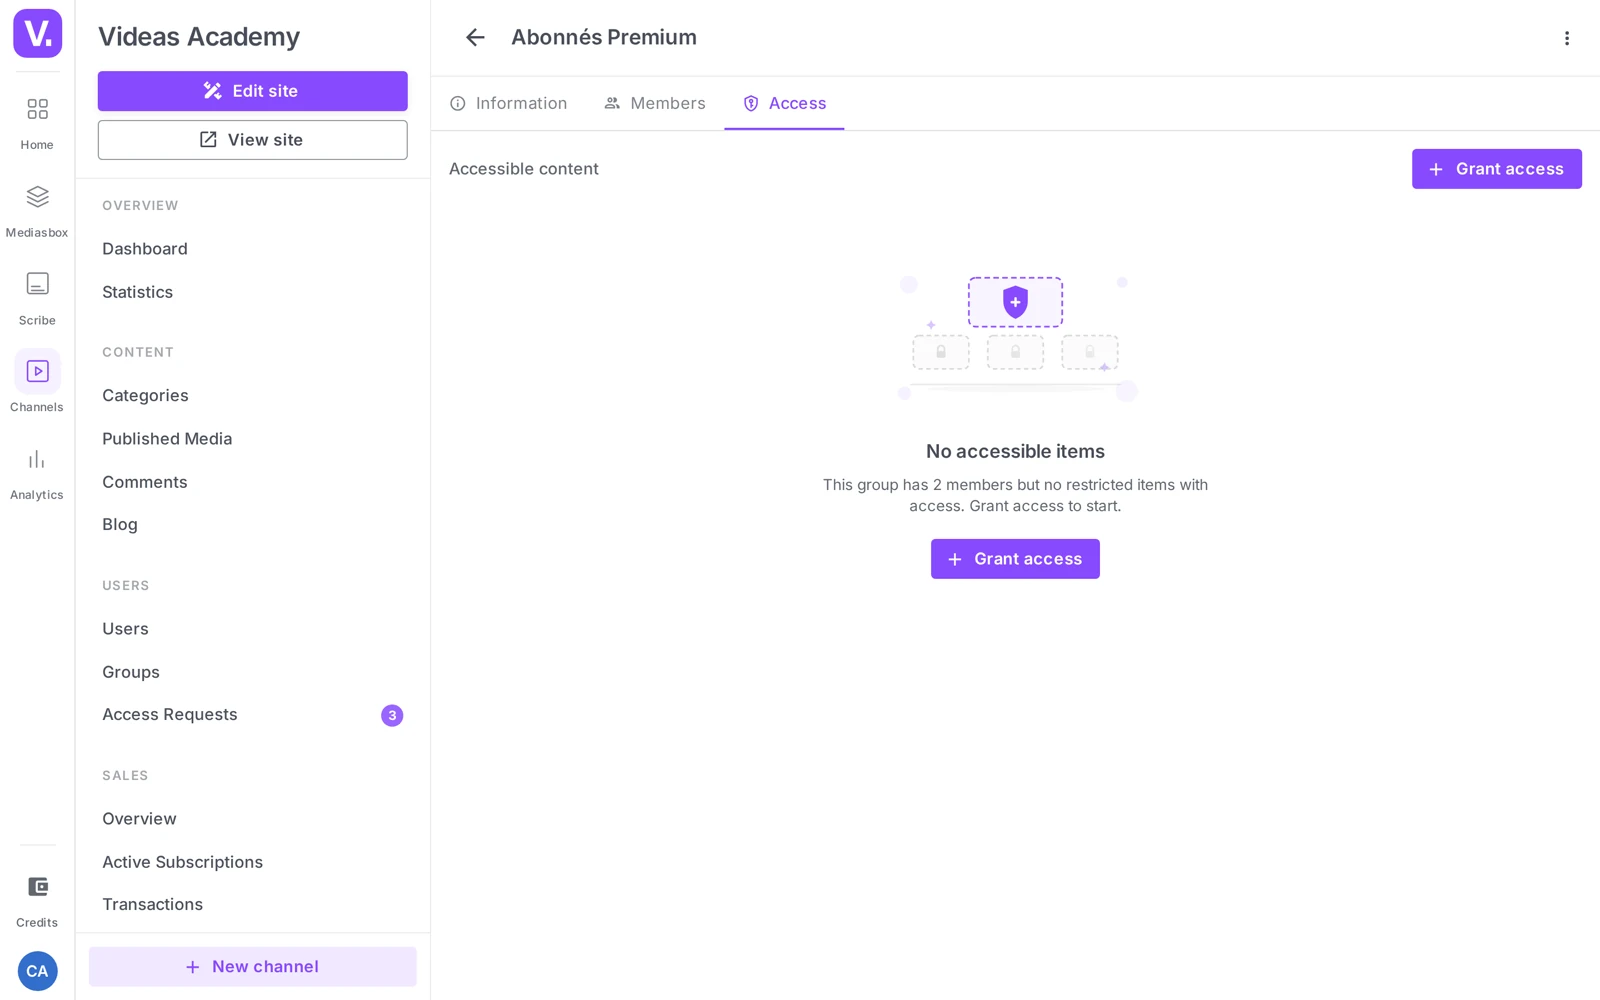
This is the heart of the mechanism. Open the Access tab (the Accessible content section) and click Grant access. The dialog offers:
- a search by title,
- a filter by category to narrow the list,
- a checkbox on each row to pick the content.
Select the content you want, then confirm with Grant N item(s). It appears in the Accessible content table (columns Title, Slug, Status).
To revoke, tick some rows then click Revoke selection. Deleting the whole group goes through the ⋮ menu at the top of the group page (to the right of the title): the Delete entry asks for confirmation (“Are you sure you want to delete this group?”) and removes access for all of its members.
Granting a whole category: granting through a group happens item by item (the category filter only narrows the list). To open up an entire category in one go, use the category’s Access rights tab instead. See Content access restrictions and Organize the catalog: categories and menus.
Belonging to several groups
A user can be a member of several groups; their access is the union of all of them. If they are in group A (items 1, 2, 3) and group B (items 3, 4, 5), they get access to {1, 2, 3, 4, 5}. There is no intersection logic.
Common use cases
- Training cohort — “Class of 2026 — March”, Expiry date in 6 months, the 25 trainees as members, the course content granted. Access cuts off on its own at the deadline.
- Internal team — “Team”, no expiry, your colleagues, access to internal content.
- Press partners — “Press — Conference”, expiry in 14 days, a dozen journalists, 3-4 specific videos.
Best practices
- Name your groups explicitly (“Class of 2026 — March” rather than “Students”): that is what you will be reading back in 6 months.
- One cohort = one group: create a new group for each session rather than recycling the old one, to keep the history clean.
- Double up the safety net for time-limited access: an expiry date on the group (closes access to the content) and an Expiry date on the accounts (see Manage users).
- Grant again after adding: a grant is a snapshot — a new video added later is not automatically shared with the group.
Where is a group’s expiry date set?
Not at creation: the New group window only asks for a name and a description. The Expiry date is set afterwards, in the group’s Information tab, under Expiry.
Past that date, the group shows an Expired badge and members lose access to content shared through this group — their other access, direct or through other groups, is untouched. You can extend or remove the date at any time to restore access.
What happens if someone belongs to several groups?
Their access is the union of all their groups. A member of group A giving content 1, 2 and 3, and of group B giving 3, 4 and 5, reaches the whole set {1, 2, 3, 4, 5}.
There is no intersection logic: belonging to two groups never restricts. That is what makes groups stack without side effects, but also what forces you to check all of a person’s groups before concluding that an access is closed.
Can I grant a whole category to a group?
Not from the group. Granting happens content by content: the category filter in the modal only narrows the list offered, it does not grant the category as a block.
To open a whole category at once, go through the Access rights tab of the category itself, which grants its restricted content to users and groups alike.
Does new content join the group automatically?
No. A grant is a snapshot: a video published afterwards, even in a category already open to the group, is not shared automatically.
That is the main upkeep of a restricted catalogue. Build the habit of re-granting after every addition, or batch your publications so you only go back once.
Should I reuse a group from one session to the next?
No: one cohort, one group. Create a new group for each session rather than emptying and refilling the old one — that keeps the record of who had access to what, and when.
Name them explicitly for the same reason: “BTS cohort — March 2026” reads effortlessly six months later, where “Students” means nothing by the second session.
How do I secure genuinely temporary access?
By doubling up the two expiries. The group’s expiry date closes access to content shared by that group. The account expiry date, set on each user’s profile, closes access to the channel itself.
The first is enough in most cases — a six-month course, a temporary press kit, a partner trial. The second is added when the person must see nothing at all once the deadline passes.
In summary
- The Users → Groups tab section; a group belongs to one channel.
- Create a group opens a Name + Description window; the Information tab then lets you set the Expiry date.
- Members: added and removed through a search; a user can belong to several groups (access is the union).
- Access: Grant access selects content (search + filter by category + checkboxes); Revoke selection takes access to items away, and the ⋮ menu at the top of the page lets you Delete the group.
- To open up an entire category, go through the category’s Access rights tab.
Related articles
Screenshots were taken on Videas Academy, an example channel built for this help center. It belongs to a fictional customer, not to Videas: your own channel carries your name, your branding and your prices.